OAuth
If you're using an auth provider like Auth0, OAuth login to third party services (GitHub, Google, Facebook) is usually just a setting you can toggle on in your provider's dashboard. But if you're using dbAuth you'll only have username/password login to start. But, adding one or more OAuth clients isn't hard. This recipe will walk you through it from scratch, adding OAuth login via GitHub.
Alternatively, consider using the redwoodjs-dbauth-oauth community package. This package streamlines the setup, includes support for multiple providers, and even includes UI components that you can use for making setup even easier.
If you do prefer to set this up manually or are just curious how OAuth and dbAuth can work together, read on!
Prerequisites
This article assumes you have an app set up and are using dbAuth. We're going to make use of the dbAuth system to validate that you're who you say you are. If you just want to try this code out in a sandbox app, you can create a test blog app from scratch by checking out the Redwood codebase itself and then running a couple of commands:
yarn install
yarn build

# typescript
yarn run build:test-project ~/oauth-app

# javascript
yarn run build:test-project ~/oauth-app --javascript
That will create a simple blog application at ~/oauth-app. You'll get a login and signup page, which we're going to enhance to include a Login with GitHub button.
Speaking of GitHub, you'll also need a GitHub account so you can create an OAuth app.
We also assume you're familiar with the basics of OAuth and the terminology surrounding it.
Login Flow
Here's the logic flow we're going to implement:
- User comes to the login page and clicks a Login with GitHub button/link.
- The link directs the browser to GitHub's OAuth process at github.com.
- The user logs in with their GitHub credentials and approves our app.
- The browser is redirected back to our app, to a new function
/api/src/functions/oauth/oauth.js. - The function fetches the OAuth access_token with a call to GitHub, using the code that was included with the redirect from GitHub in the previous step.
- When the access_token is received, the function then requests the user data from GitHub via another fetch to GitHub's API.
- The function then checks our database for a user identified by GitHub's
id. If no user is found, theUserrecord is created using the info from the fetch in the previous step. - The user data from our own database is used to create the same cookie that dbAuth creates on a successful login.
- The browser is redirected back to our site, and the user is now logged in.
GitHub OAuth App Setup
In order to allow OAuth login with GitHub, we need to create an OAuth App. The instructions below are for creating one on your personal GitHub account, but if your app lives in a separate organization then you can perform the same steps under the org instead.
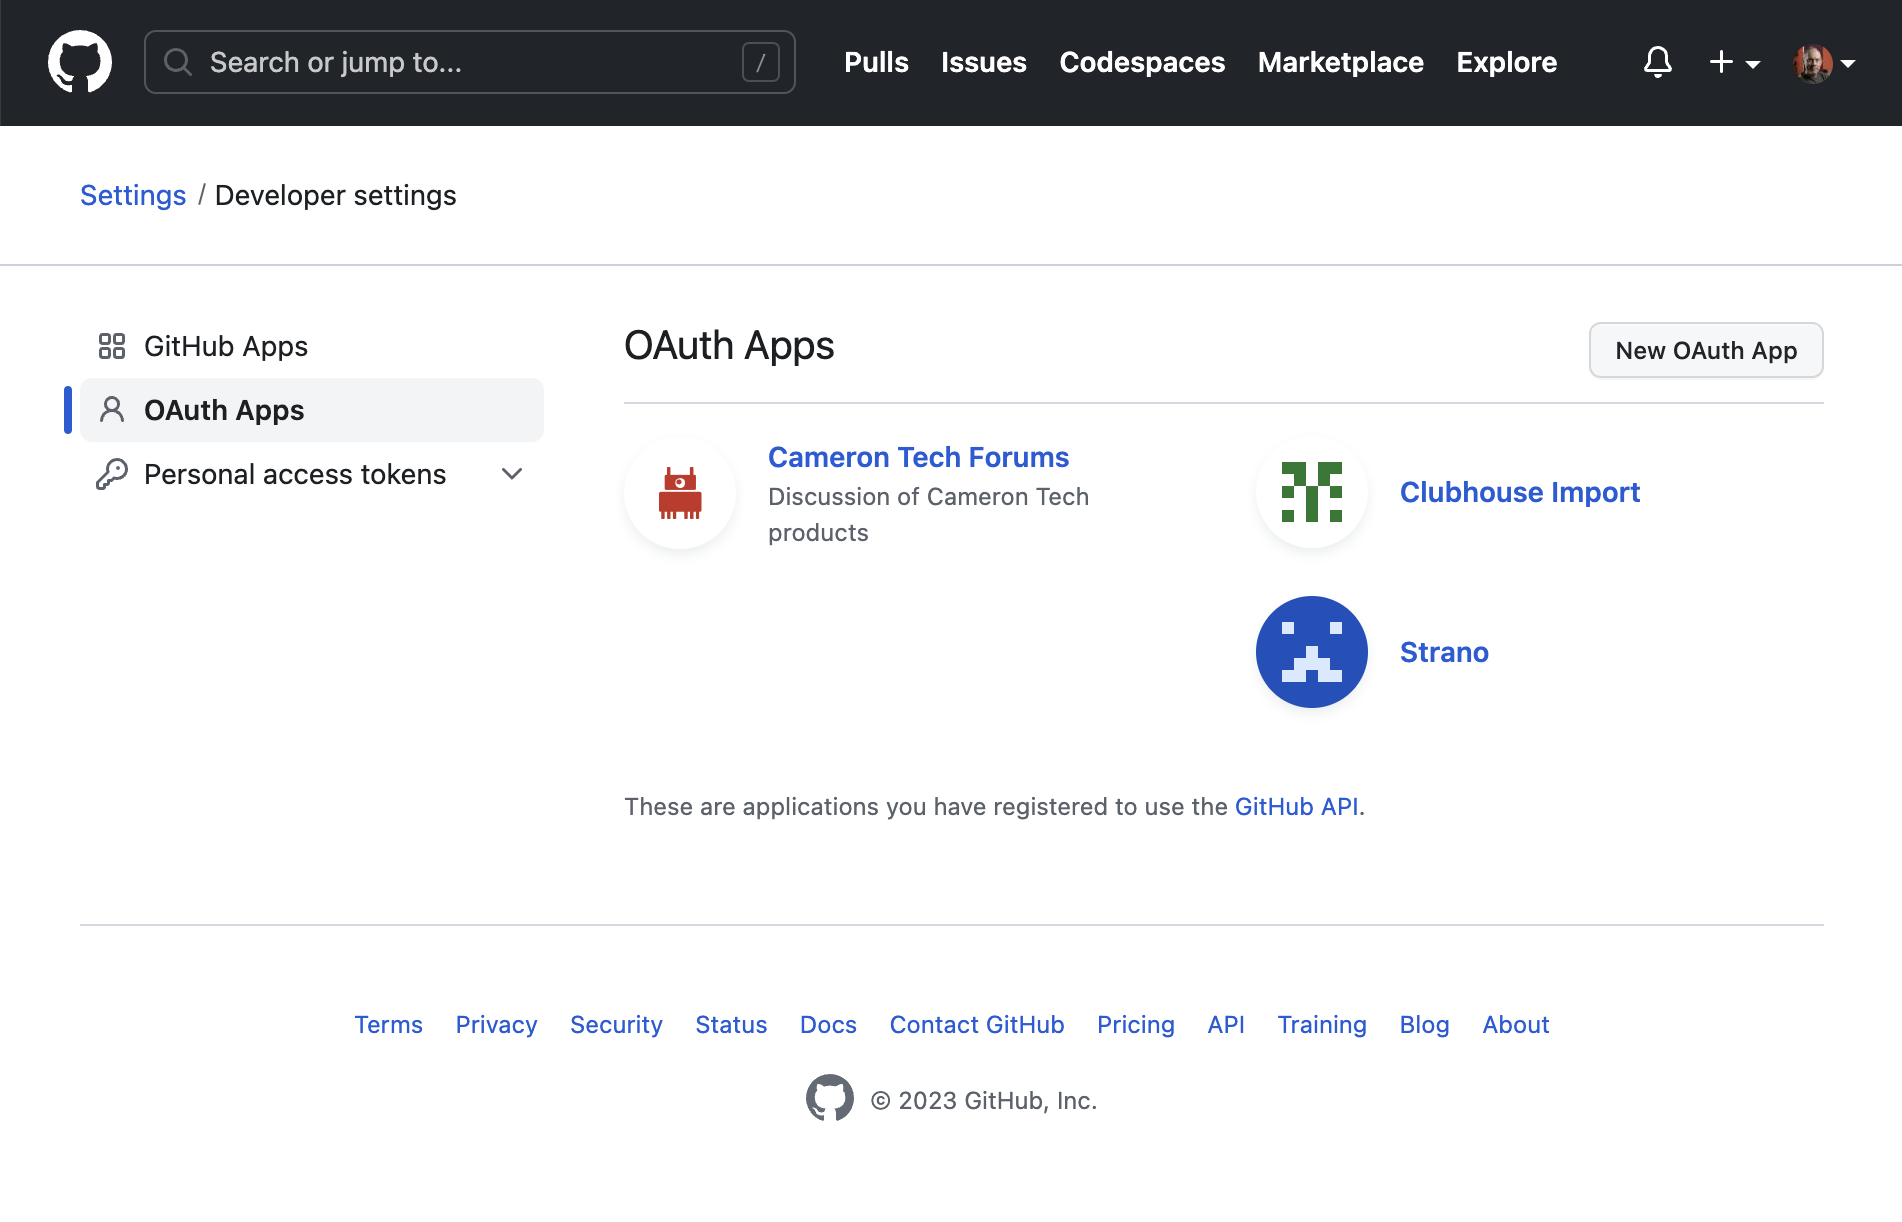
First go to your Settings and then the Developer settings at the bottom left. Finally, click the OAuth Apps nav item at left:
Click New OAuth App and fill it in something like this:
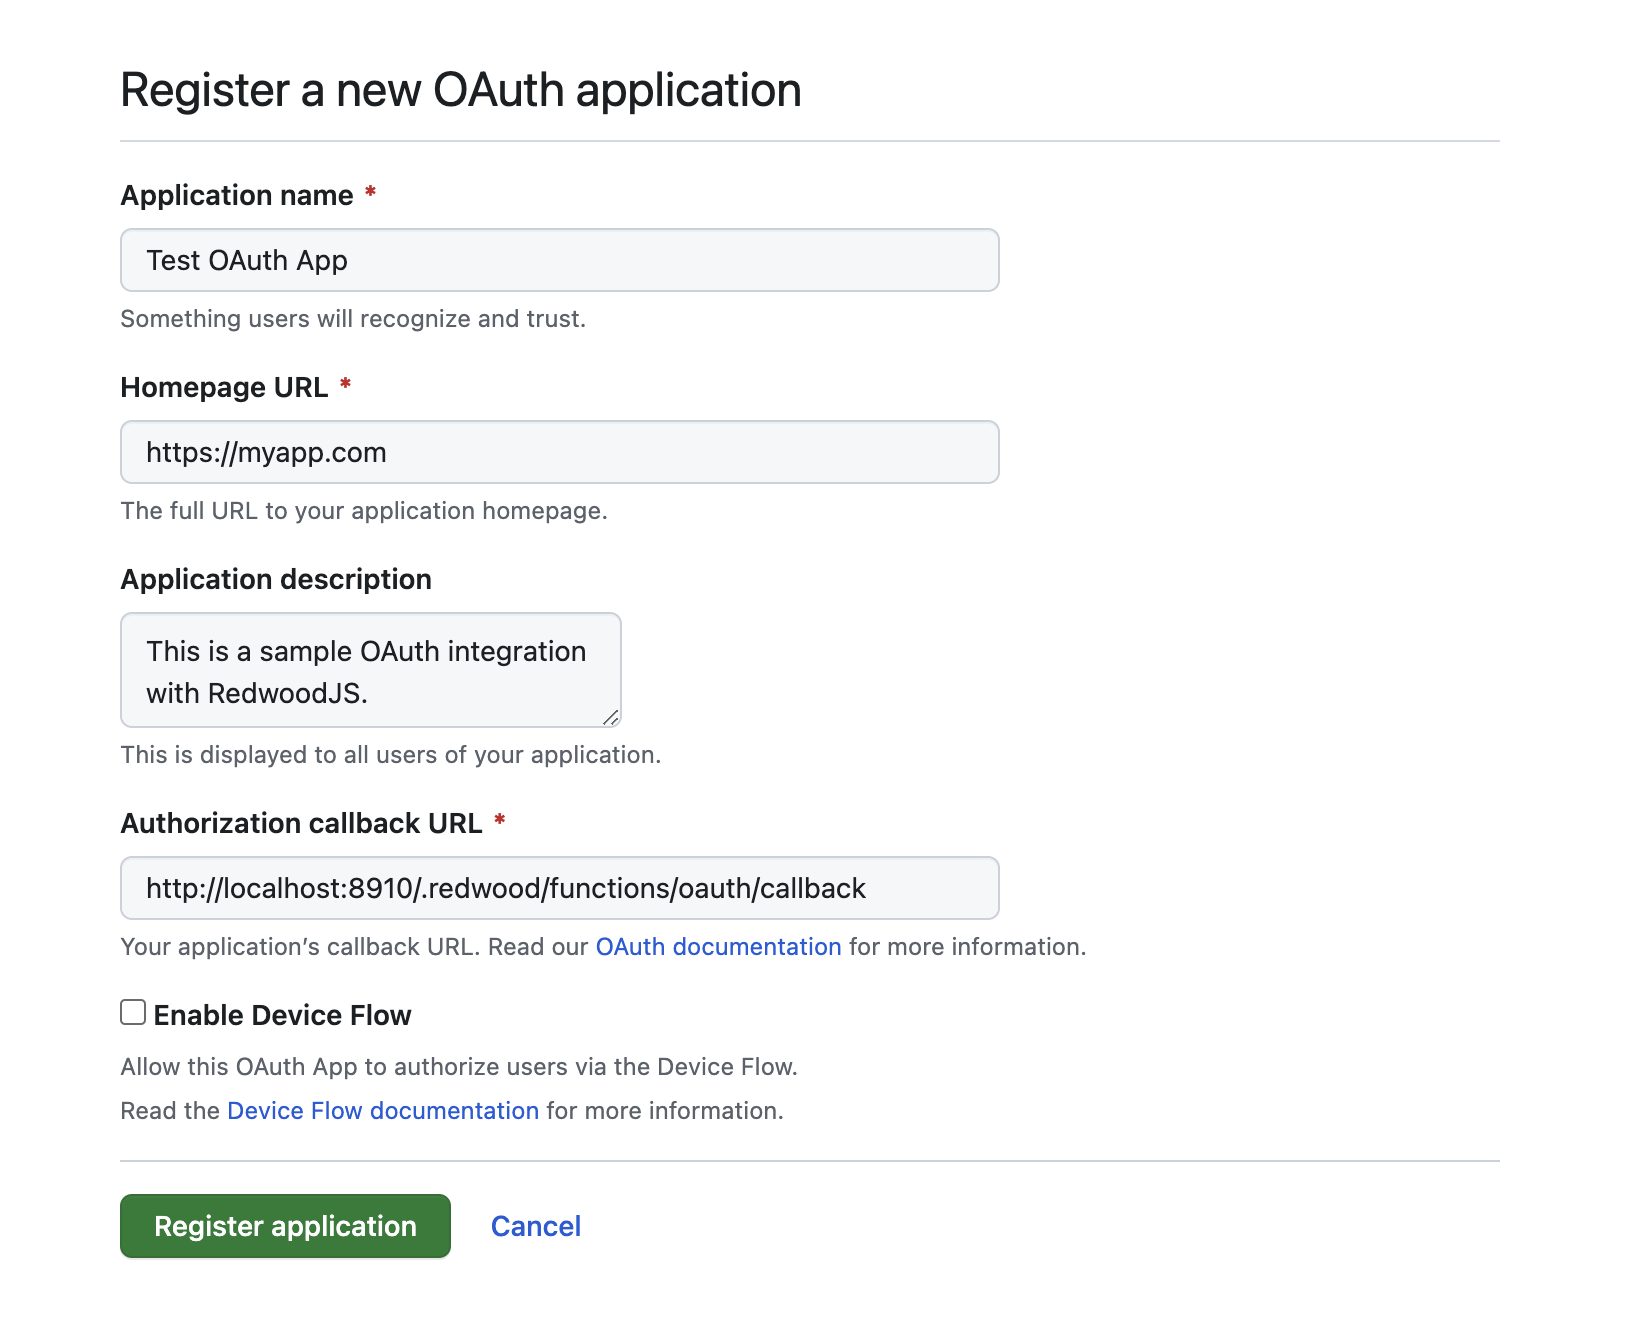
The important part is the Authorization callback URL which is where GitHub will redirect you back once authenticated (step 4 of the login flow above). This callback URL assumes you're using the default function location of /.redwood/functions. If you've changed that in your app be sure to change it here as well.
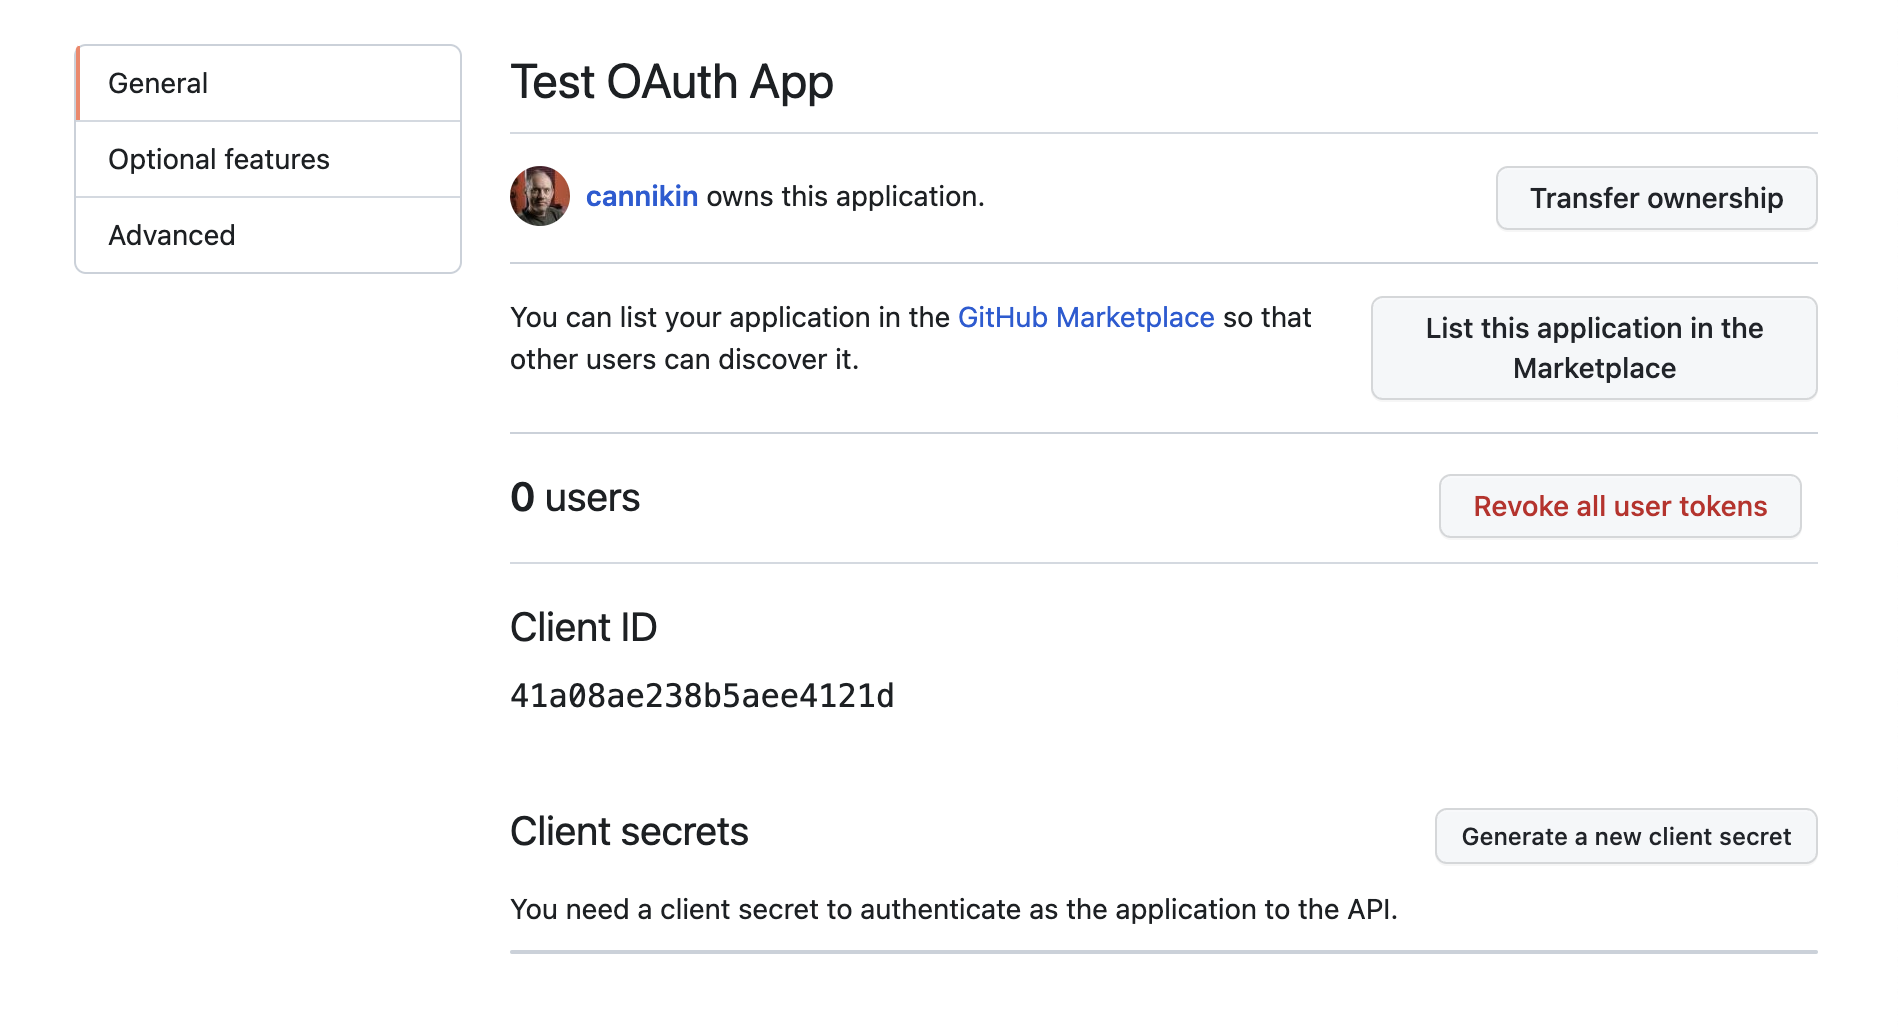
Click Register application and then on the screen that follows, click the Generate a new client secret button:
You may be asked to use your 2FA code to verify that you're who you say you are, but eventually you should see your new Client secret. Copy that, and the Client ID above it:
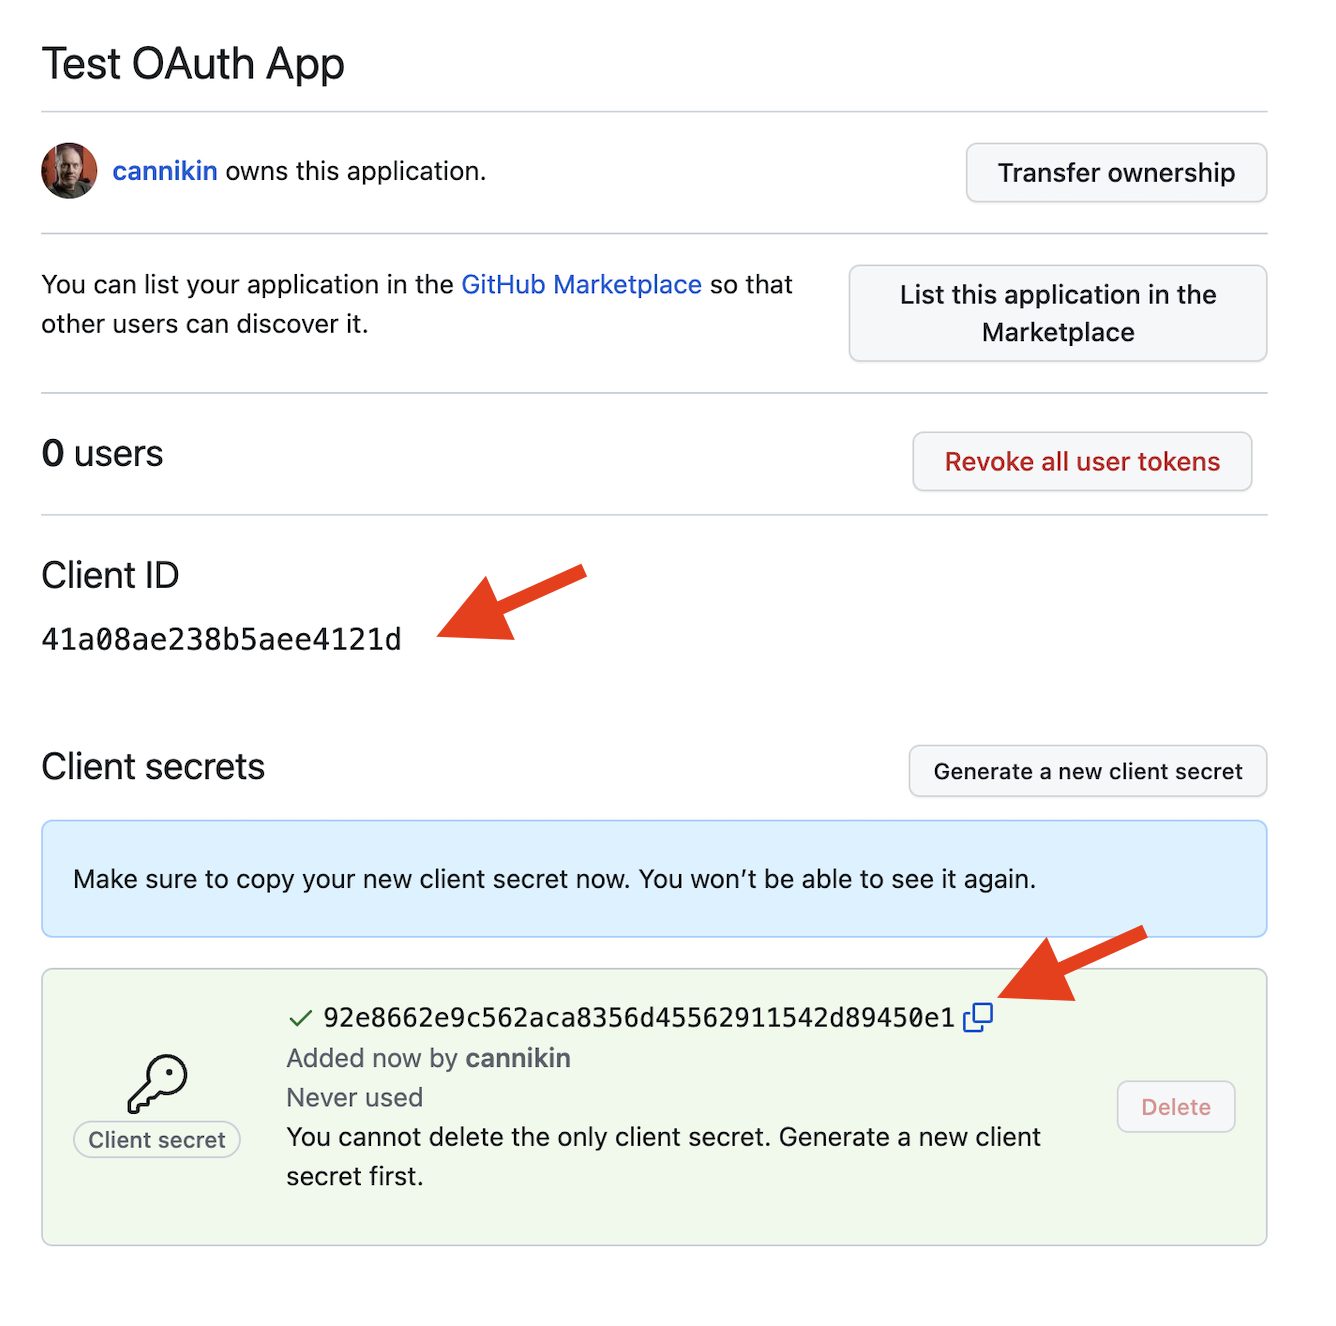
Add those to your app's .env file (or wherever you're managing your secrets). Note that it's best to have a different OAuth app on GitHub for each environment you deploy to. Consider this one the dev app, and you'll create a separate one with a different client ID and secret when you're ready to deploy to production:
GITHUB_OAUTH_CLIENT_ID=41a08ae238b5aee4121d
GITHUB_OAUTH_CLIENT_SECRET=92e8662e9c562aca8356d45562911542d89450e1
We also need to denote what data we want permission to read from GitHub once someone authorizes our app. We'll want the user's public info, and probably their email address. That's only two scopes, and we can add those as another ENV var:
GITHUB_OAUTH_CLIENT_ID=41a08ae238b5aee4121d
GITHUB_OAUTH_CLIENT_SECRET=92e8662e9c562aca8356d45562911542d89450e1
GITHUB_OAUTH_SCOPES="read:user user:email"
If you wanted access to more GitHub data, you can specify additional scopes here and they'll be listed to the user when they go to authorize your app. You can also change this list in the future, but you'll need to log the user out and the next time they click Login with GitHub they'll be asked to authorize your app again, with a new list of requested scopes.
One more ENV var, this is the same callback URL we told GitHub about. This is used in the link in the Login with GitHub button and gives GitHub another chance to verify that you're who you say you are: you're proving that you know where you're supposed to redirect back to:
GITHUB_OAUTH_CLIENT_ID=41a08ae238b5aee4121d
GITHUB_OAUTH_CLIENT_SECRET=92e8662e9c562aca8356d45562911542d89450e1
GITHUB_OAUTH_SCOPES="read:user user:email"
GITHUB_OAUTH_REDIRECT_URI="http://localhost:8910/.redwood/functions/oauth/callback"
The Login Button
This part is pretty easy, we're just going to add a link/button to go directly to GitHub to begin the OAuth process:
<a href={`https://github.com/login/oauth/authorize?client_id=${
    process.env.GITHUB_OAUTH_CLIENT_ID
  }&redirect_uri=${
    process.env.GITHUB_OAUTH_REDIRECT_URI
  }&scope=${process.env.GITHUB_OAUTH_SCOPES.split(' ').join('+')}`}
  className="mx-auto block w-48 rounded bg-gray-800 px-4 py-2 text-center text-xs font-semibold uppercase tracking-wide text-white">
  Login with GitHub
</a>
This example uses Tailwind to style the link to match the rest of the default dbAuth login page
You can put this same link on your signup page as well, since using the OAuth flow will be dual-purpose: it will log the user in if a local user already exists, or it will create the user and then log them in.
We're using several of our new ENV vars here, and need to tell Redwood to make them available to the web side during the build process. Add them to the includeEnvironmentVariables key in redwood.toml:
[web]
  title = "Redwood App"
  port = "${WEB_DEV_PORT:8910}"
  apiUrl = "/.redwood/functions"
  includeEnvironmentVariables = ["GITHUB_OAUTH_CLIENT_ID", "GITHUB_OAUTH_REDIRECT_URI", "GITHUB_OAUTH_SCOPES"]
[api]
  port = "${API_DEV_PORT:8911}"
[browser]
  open = true
[notifications]
  versionUpdates = ["latest"]
Restart your dev server to pick up the new TOML settings, and your link should appear:
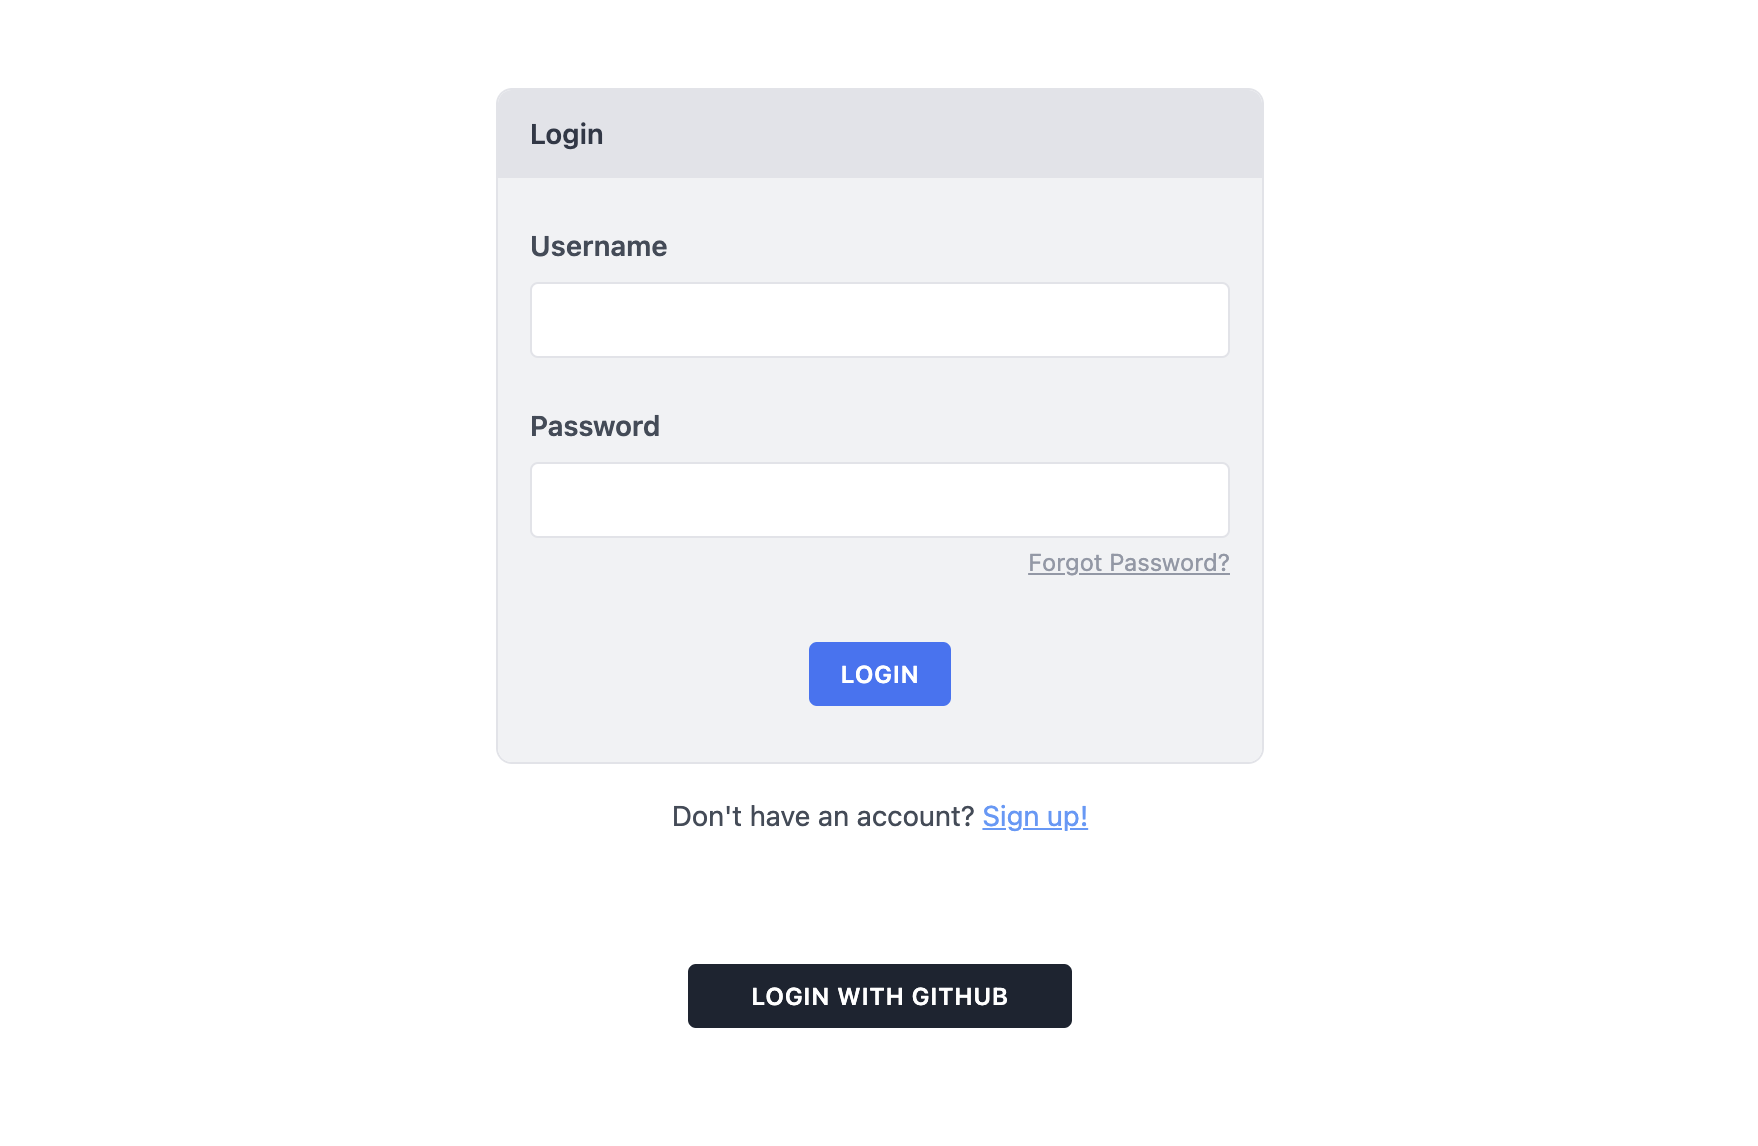
Go ahead and click it, and you should be taken to GitHub to authorize your GitHub login to work with your app. You'll see the scopes we requested listed under the Personal User Data heading:
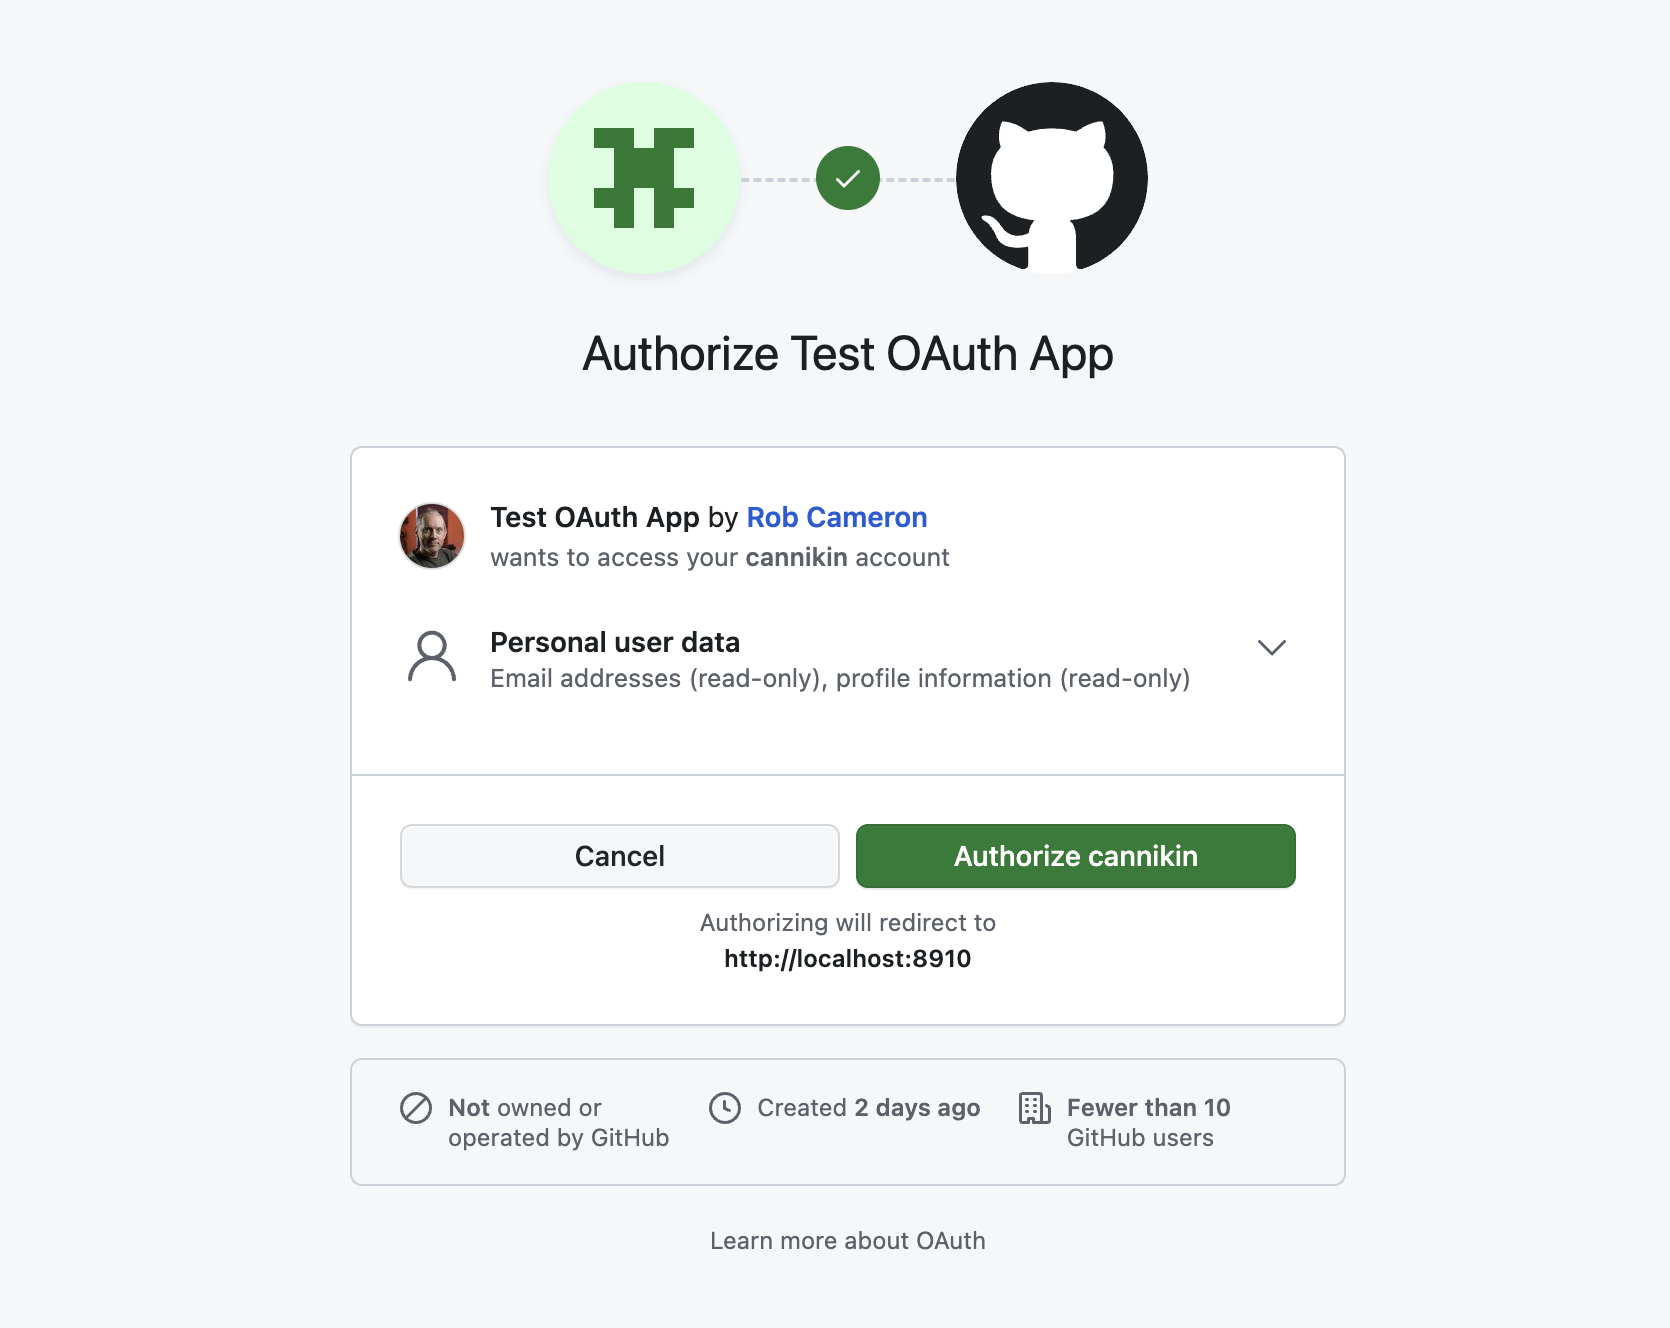
If you get an error here that says "The redirect_uri MUST match the registered callback URL for this application" verify that the redirect URL you entered on GitHub and the one you put into the GITHUB_OAUTH_REDIRECT_URL ENV var are identical!
Click authorize and you should end up seeing some JSON, and an error:

That's coming from our app because we haven't created the oauth function that GitHub redirects to. But you'll see a code in the URL, which means GitHub is happy with our flow so far. Now we need to trade that code for an access_token. We'll do that in our /oauth function.
This nicely formatted JSON comes from the JSON Viewer Chrome extension.
The /oauth Function
We can have Redwood generate a shell of our new function for us:
yarn rw g function oauth
That will create the function at /api/src/functions/oauth/oauth.js. If we retry the Login with GitHub button now, we'll see the output of that function instead of the error:

Now let's start filling out this function with the code we need to get the access_token.
Fetching the access_token
We told GitHub to redirect to /oauth/callback which appears like it would be a subdirectory, or child route of our oauth function, but in reality everything after /oauth just gets shoved into an event.path variable that we'll need to inspect to make sure it has the proper parts (like /callback). We can do that in the hander():
export const handler = async (event, _context) => {
  switch (event.path) {
    case '/oauth/callback':
      return await callback(event)
    default:
      // Whatever this is, it's not correct, so return "Not Found"
      return {
        statusCode: 404,
      }
  }
}

const callback = async (event) => {
  return { body: 'ok' }
}
The callback() function is where we'll actually define the rest of our flow. We can verify this is working by trying a couple of different URLs in the browser and see that /oauth/callback returns a 200 and "ok" in the body of the page, but anything else returns a 404.
Now we need to make a request to GitHub to trade the code for an access_token. This is handled by a fetch:
const callback = async (event) => {
  const { code } = event.queryStringParameters

  const response = await fetch(`https://github.com/login/oauth/access_token`, {
    method: 'POST',
    headers: {
      Accept: 'application/json',
      'Content-Type': 'application/json',
    },
    body: JSON.stringify({
      client_id: process.env.GITHUB_OAUTH_CLIENT_ID,
      client_secret: process.env.GITHUB_OAUTH_CLIENT_SECRET,
      redirect_uri: process.env.GITHUB_OAUTH_REDIRECT_URI,
      code,
    }),
  })

  const { access_token, scope, error } = JSON.parse(await response.text())

  if (error) {
    return { statuscode: 400, body: error }
  }

  return {
    body: JSON.stringify({ access_token, scope, error }),
  }
}
First we get the code out of the query string variables, then make a POST fetch() to GitHub, setting the required JSON body to include several of the ENV vars we've set, as well as the code we got from the GitHub redirect. Then we parse the response JSON and just return it in the browser to make sure it worked. If something went wrong (error is not undefined) then we'll output the error message in the body of the page.
Let's try it: go back to the login page, click the Login with GitHub button and see what happens:

You can also verify that the error response works by, for example, removing the code key from the fetch(), and see GitHub complain:

Great, GitHub has authorized us and now we can get details about the actual user from GitHub.
Retrieving GitHub User Details
We need some unique identifier to tie a user in GitHub to a user in our database. The access_token we retrieved allows us to make requests to GitHub's API and return data for the user that the access_token is attached to, up to the limits of the scopes we requested. GitHub has a unique user id that we can use to tie the two together. Let's request that data and dump it to the browser so we can see that the request works.
To keep things straight in our heads, let's call our local user user and the GitHub user the providerUser (since GitHub is "providing" the OAuth credentials).
Let's make the API call to GitHub's user info endpoint and dump the result to the browser:
const callback = async (event) => {
  const { code } = event.queryStringParameters

  const response = await fetch(`https://github.com/login/oauth/access_token`, {
    method: 'POST',
    headers: {
      Accept: 'application/json',
      'Content-Type': 'application/json',
    },
    body: JSON.stringify({
      client_id: process.env.GITHUB_OAUTH_CLIENT_ID,
      client_secret: process.env.GITHUB_OAUTH_CLIENT_SECRET,
      redirect_uri: process.env.GITHUB_OAUTH_REDIRECT_URI,
      code,
    }),
  })

  const { access_token, scope, error } = JSON.parse(await response.text())

  if (error) {
    return { statuscode: 400, body: error }
  }

  try {
    const providerUser = await getProviderUser(access_token)
    return {
      body: JSON.stringify(providerUser),
    }
  } catch (e) {
    return { statuscode: 500, body: e.message }
  }
}

const getProviderUser = async (token) => {
  const response = await fetch('https://api.github.com/user', {
    headers: { Authorization: `Bearer ${token}` },
  })
  const body = JSON.parse(await response.text())

  return body
}
If all went well you should get a ton of juicy data:
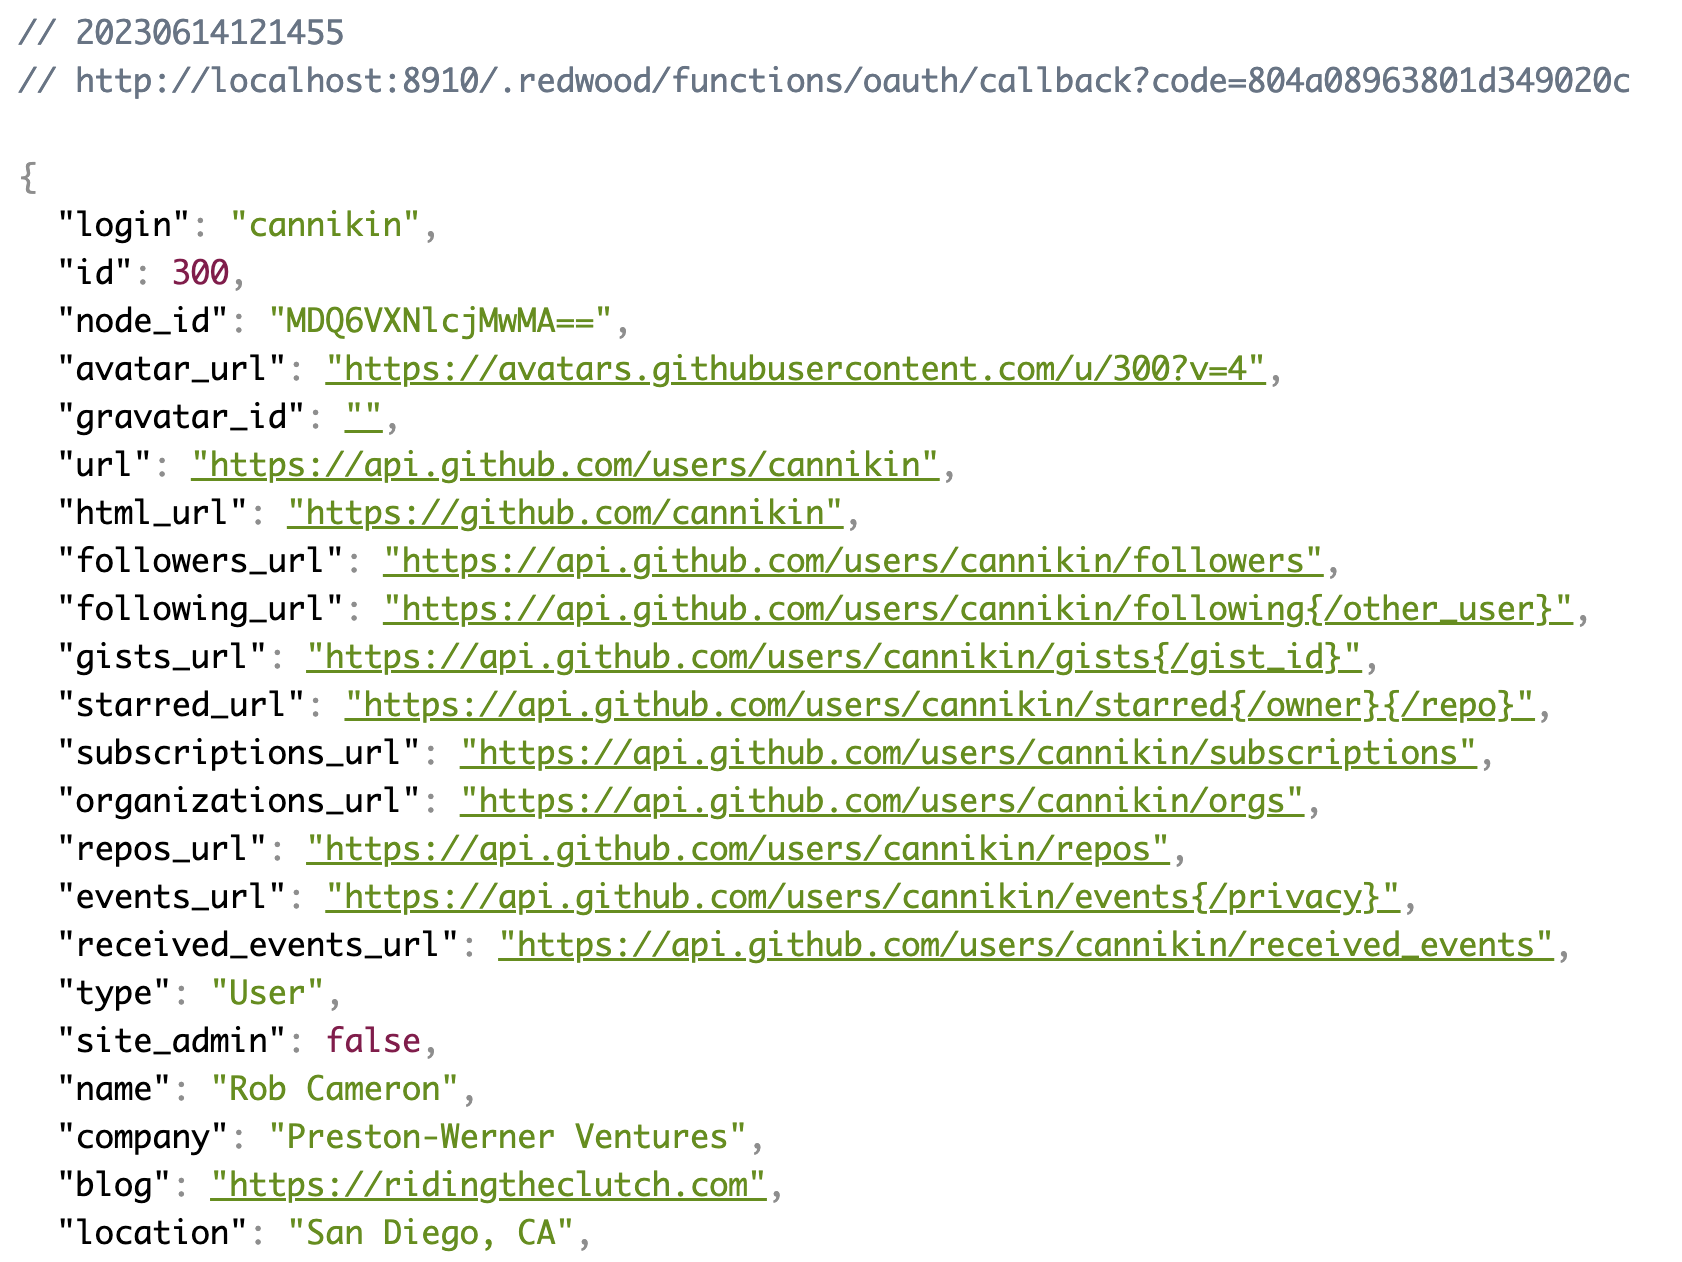
If something went wrong with the fetch you should get a 500 and the error message output in the body. Try setting the token in the Authorization header to something like foobar to verify:

Great, we've got the user data, now what do we do with it?
Database Updates
We've got a bunch of user data that we can use to create a User in our own database. But we'll want to look up that same user in the future when they log back in. We have a couple of ways we can go about doing this:
- Keep our
Usermodel as-is and create the user in our local database. When the user logs in again, look them by their email address stored in GitHub. Cons: If the user changes their email in GitHub we won't be able to find them the next time they log in, and we would create a new user. - Keep the
Usermodel as-is but create the user with the sameidas the one we get from GitHub. Cons: If we keep username/password login, we would need to create new users with anidthat won't ever clash with the ones from GitHub. - Add a column to
UserlikegithubIdthat stores the GitHubidso that we can find the user again the next time they come to login. Cons: If we add more providers in the future we'll need to keep adding new*Idcolumns for each. - Create a new one-to-many relationship model that stores the GitHub
idas a single row, tied to theuserIdof theUsertable, and a new row for each ID of any future providers. Cons: More complex data structure.
Option #4 will be the most flexible going forward if we ever decide to add more OAuth providers. And if my experience is any indication, everyone always wants more login providers.
So let's create a new Identity table that stores the name of the provider and the ID in that system. Logically it will look like this:
┌───────────┐       ┌────────────┐
│   User    │       │  Identity  │
├───────────┤       ├────────────┤
│ id        │•──┐   │ id         │
│ name      │   └──<│ userId     │
│ email     │       │ provider   │
│ ...       │       │ uid        │
└───────────┘       │ ...        │
                    └────────────┘
For now provider will always be github and the uid will be the GitHub's unique ID. uid should be a String, because although GitHub's ID's are integers, not every OAuth provider is guaranteed to use ints.
Prisma Schema Updates
Here's the Identity model definition:
model Identity {
  id                  Int       @id @default(autoincrement())
  provider            String
  uid                 String
  userId              Int
  user                User      @relation(fields: [userId], references: [id])
  accessToken         String?
  scope               String?
  lastLoginAt         DateTime  @default(now())
  createdAt           DateTime  @default(now())
  updatedAt           DateTime  @updatedAt

  @@unique([provider, uid])
  @@index(userId)
}
We're also storing the accessToken and scope that we got back from the last time we retrived them from GitHub, as well as a timestamp for the last time the user logged in. Storing the scope is useful because if you ever change them, you may want to notify users that have the previous scope definition to re-login so the new scopes can be authorized.
There's no GraphQL SDL tied to the Identity table, so it is not accessible via our API. But, if you ever did create an SDL and service, be sure that accessToken is not in the list of fields exposed publicly!
We'll need to add an identities relation to the User model, and make the previously required hashedPassword and salt fields optional (since users may want to only authenticate via GitHub, they'll never get to enter a password):
model User {
  id                  Int       @id @default(autoincrement())
  email               String    @unique
  hashedPassword      String?
  salt                String?
  identities          Identity[]
  ...
}
Save these as a migration and apply them to the database:
yarn rw prisma migrate dev
Give it a name like "create identity". That's it for the database. Let's return to the /oauth function and start working with our new Identity model.
Creating Users and Identities
On a successful GitHub OAuth login we'll want to first check and see if a user already exists with the provider info. If so, we can go ahead and log them in. If not, we'll need to create it first, then log them in.
Let's add some code that returns the user if found, otherwise it creates the user and returns it, so that the rest of our code doesn't have to care.
Be sure to import db at the top of the file if you haven't already!
import { db } from 'src/lib/db'

const callback = async (event) => {
  const { code } = event.queryStringParameters

  const response = await fetch(`https://github.com/login/oauth/access_token`, {
    method: 'POST',
    headers: {
      Accept: 'application/json',
      'Content-Type': 'application/json',
    },
    body: JSON.stringify({
      client_id: process.env.GITHUB_OAUTH_CLIENT_ID,
      client_secret: process.env.GITHUB_OAUTH_CLIENT_SECRET,
      redirect_uri: process.env.GITHUB_OAUTH_REDIRECT_URI,
      code,
    }),
  })

  const { access_token, scope, error } = JSON.parse(await response.text())

  if (error) {
    return { statuscode: 400, body: error }
  }

  try {
    const providerUser = await getProviderUser(access_token)
    const user = await getUser({ providerUser, accessToken: access_token, scope })
    return {
      body: JSON.stringify(user)
    }
  } catch (e) {
    return { statuscode: 500, body: e.message }
  }
}

const getUser = async ({ providerUser, accessToken, scope }) => {
  const { user, identity } = await findOrCreateUser(providerUser)

  await db.identity.update({
    where: { id: identity.id },
    data: { accessToken, scope, lastLoginAt: new Date() },
  })

  return user
}

const findOrCreateUser = async (providerUser) => {
  const identity = await db.identity.findFirst({
    where: { provider: 'github', uid: providerUser.id.toString() }
  })

  if (identity) {
    // identity exists, return the user
    const user = await db.user.findUnique({ where: { id: identity.userId }})
    return { user, identity }
  }

  // identity not found, need to create it and the user
  return await db.$transaction(async (tx) => {
    const user = await tx.user.create({
      data: {
        email: providerUser.email,
        fullName: providerUser.name,
      },
    }

    const identity = await tx.identity.create({
      data: {
        userId: user.id,
        provider: 'github',
        uid: providerUser.id.toString()
      }
    })

    return { user, identity }
  })
}
Let's break that down.
const providerUser = await getProviderUser(access_token)
const user = await getUser({ providerUser, accessToken: access_token, scope })
return {
  body: JSON.stringify(user),
}
After getting the providerUser we're going to find our local user, and then dump the user to the browser to verify.
const getUser = async ({ providerUser, accessToken, scope }) => {
  const { user, identity } = await getOrCreateUser(providerUser)

  await db.identity.update({
    where: { id: identity.id },
    data: { accessToken, scope, lastLoginAt: new Date() },
  })

  return user
}
The getUser() function is going to return the user, whether it had to be created or not. Either way, the attached identity is updated with the current value for the access_token (note the case change, try not to get confused!), as well as the scope and lastLoginAt timestamp. findOrCreateUser() is going to do the heavy lifting:
const findOrCreateUser = async (providerUser) => {
  const identity = await db.identity.findFirst({
    where: { provider: 'github', uid: providerUser.id.toString() },
  })

  if (identity) {
    const user = await db.user.findUnique({ where: { id: identity.userId } })
    return { user, identity }
  }

  // ...
}
If the user already exists, great! Return it, and the attached identity so that we can update the details. If the user doesn't exist already:
const findOrCreateUser = async (providerUser) => {
  // ...

  return await db.$transaction(async (tx) => {
    const user = await tx.user.create({
      data: {
        email: providerUser.email,
        fullName: providerUser.name,
      },
    }

    const identity = await tx.identity.create({
      data: {
        userId: user.id,
        provider: 'github',
        uid: providerUser.id.toString()
      }
    })

    return { user, identity }
  })
}
We create the user and the identity records inside a transaction so that if something goes wrong, both records fail to create. The error would bubble up to the try/catch inside callback(). (The Redwood test project has a required fullName field that we fill with the name attribute from GitHub.)
Don't forget the toString() calls whenever we read or write the providerUser.id since we made the uid of type String.
If everything worked then on clicking Login with GitHub we should now see a dump of the actual user from our local database:
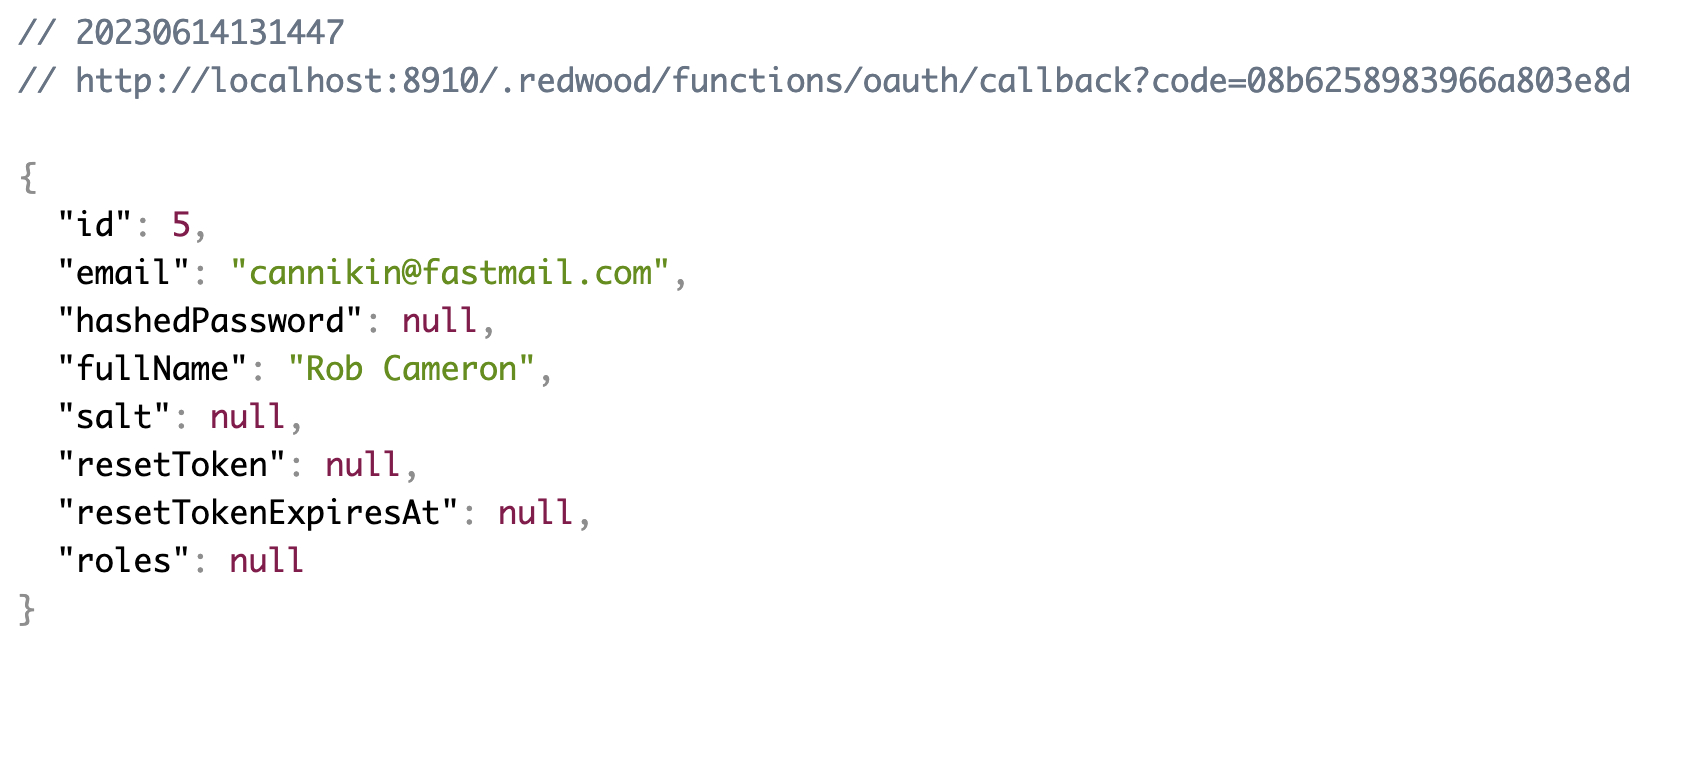
You can take a look in the database and verify that the User and Identity were created. Start up the Prisma Studio (which is already included with Redwood):
yarn rw prisma studio

Great! But, if you go back to your homepage, you'll find that you're not actually logged in. That's because we're not setting the cookie that dbAuth expects to see to consider you logged in. Let's do that, and then our login will be complete!
Setting the Login Cookie
In order to let dbAuth do the work of actually considering us logged in (and handling stuff like reauthentication and logout) we'll just set the same cookie that the username/password login system would have if the user logged in with a username and password.
Setting a cookie in the browser is a matter of returning a Set-Cookie header in the response from the server. We've been responding with a dump of the user object, but now we'll do a real return, including the cookie and a Location header to redirect us back to the site.
Don't forget the new CryptoJS import at the top!
import CryptoJS from 'crypto-js'
import { cookieName } from '@redwoodjs/auth-dbauth-api'
import { cookieName as cookie } from 'src/lib/auth'

const callback = async (event) => {
  const { code } = event.queryStringParameters

  const response = await fetch(`https://github.com/login/oauth/access_token`, {
    method: 'POST',
    headers: {
      Accept: 'application/json',
      'Content-Type': 'application/json',
    },
    body: JSON.stringify({
      client_id: process.env.GITHUB_OAUTH_CLIENT_ID,
      client_secret: process.env.GITHUB_OAUTH_CLIENT_SECRET,
      redirect_uri: process.env.GITHUB_OAUTH_REDIRECT_URI,
      code,
    }),
  })

  const { access_token, scope, error } = JSON.parse(await response.text())

  if (error) {
    return { statuscode: 400, body: error }
  }

  try {
    const providerUser = await getProviderUser(access_token)
    const user = await getUser({
      providerUser,
      accessToken: access_token,
      scope,
    })
    const cookie = secureCookie(user)

    return {
      statusCode: 302,
      headers: {
        'Set-Cookie': cookie,
        Location: '/',
      },
    }
  } catch (e) {
    return { statuscode: 500, body: e.message }
  }
}

const secureCookie = (user) => {
  const expires = new Date()
  expires.setFullYear(expires.getFullYear() + 1)

  const cookieAttrs = [
    `Expires=${expires.toUTCString()}`,
    'HttpOnly=true',
    'Path=/',
    'SameSite=Lax',
    `Secure=${process.env.NODE_ENV !== 'development'}`,
  ]
  const data = JSON.stringify({ id: user.id })

  const encrypted = CryptoJS.AES.encrypt(
    data,
    process.env.SESSION_SECRET
  ).toString()
  //if you're using dbAuth v7.6.2, you have to change the cookie name. You can comment out the line below and make the next line as comment.
  //return [`${cookieName(cookie)}=${encrypted}`, ...cookieAttrs].join('; ')
  return [`session=${encrypted}`, ...cookieAttrs].join('; ')
}
secureCookie() takes care of creating the cookie that matches the one set by dbAuth. The attributes that we're setting are actually a copy of the ones set in the authHandler in /api/src/functions/auth.js and you could remove some duplication between the two by exporting the cookie object from auth.js and then importing it and using it here. We've set the cookie to expire in a year because, let's admit it, no one likes having to log back in again.
At the end of callback() we set the Set-Cookie and Location headers to send the browser back to the homepage of our app.
Try it out, and as long as you have an indication on your site that a user is logged in, you should see it! In the case of the test project, you'll see "Log Out" at the right side of the top nav instead of "Log In". Try logging out and then back again to test the whole flow from scratch.
The Complete /oauth Function
Here's the oauth function in its entirety:
import CryptoJS from 'crypto-js'

import { db } from 'src/lib/db'

export const handler = async (event, _context) => {
  switch (event.path) {
    case '/oauth/callback':
      return await callback(event)
    default:
      // Whatever this is, it's not correct, so return "Not Found"
      return {
        statusCode: 404,
      }
  }
}

const callback = async (event) => {
  const { code } = event.queryStringParameters

  const response = await fetch(`https://github.com/login/oauth/access_token`, {
    method: 'POST',
    headers: {
      Accept: 'application/json',
      'Content-Type': 'application/json',
    },
    body: JSON.stringify({
      client_id: process.env.GITHUB_OAUTH_CLIENT_ID,
      client_secret: process.env.GITHUB_OAUTH_CLIENT_SECRET,
      redirect_uri: process.env.GITHUB_OAUTH_REDIRECT_URI,
      code,
    }),
  })

  const { access_token, scope, error } = JSON.parse(await response.text())

  if (error) {
    return { statuscode: 400, body: error }
  }

  try {
    const providerUser = await getProviderUser(access_token)
    const user = await getUser({
      providerUser,
      accessToken: access_token,
      scope,
    })
    const cookie = secureCookie(user)

    return {
      statusCode: 302,
      headers: {
        'Set-Cookie': cookie,
        Location: '/',
      },
    }
  } catch (e) {
    return { statuscode: 500, body: e.message }
  }
}

const secureCookie = (user) => {
  const expires = new Date()
  expires.setFullYear(expires.getFullYear() + 1)

  const cookieAttrs = [
    `Expires=${expires.toUTCString()}`,
    'HttpOnly=true',
    'Path=/',
    'SameSite=Lax',
    `Secure=${process.env.NODE_ENV !== 'development'}`,
  ]
  const data = JSON.stringify({ id: user.id })

  const encrypted = CryptoJS.AES.encrypt(
    data,
    process.env.SESSION_SECRET
  ).toString()

  return [`session=${encrypted}`, ...cookieAttrs].join('; ')
}

const getProviderUser = async (token) => {
  const response = await fetch('https://api.github.com/user', {
    headers: { Authorization: `Bearer ${token}` },
  })
  const body = JSON.parse(await response.text())

  return body
}

const getUser = async ({ providerUser, accessToken, scope }) => {
  const { user, identity } = await findOrCreateUser(providerUser)

  await db.identity.update({
    where: { id: identity.id },
    data: { accessToken, scope, lastLoginAt: new Date() },
  })

  return user
}

const findOrCreateUser = async (providerUser) => {
  const identity = await db.identity.findFirst({
    where: { provider: 'github', uid: providerUser.id.toString() },
  })

  if (identity) {
    // identity exists, return the user
    const user = await db.user.findUnique({ where: { id: identity.userId } })
    return { user, identity }
  }

  // identity not found, need to create it and the user
  return await db.$transaction(async (tx) => {
    const user = await tx.user.create({
      data: {
        email: providerUser.email,
        fullName: providerUser.name,
      },
    })

    const identity = await tx.identity.create({
      data: {
        userId: user.id,
        provider: 'github',
        uid: providerUser.id.toString(),
      },
    })

    return { user, identity }
  })
}
Enhancements
This is barebones implementation of a single OAuth provider. What can we do to make it better?
More Providers
We hardcoded "github" as the provider in a couple of places, as well as hardcoding GitHub's API endpoint for fetching user data. That obviously limits this implementation to only support GitHub.
A more flexible version could include the provider as part of the callback URL, and then our code can see that and choose which provider to set and how to get user details. Maybe the OAuth redirect is /oauth/github/callback and /oauth/twitter/callback. Then parse that out and delegate to a different function altogether, or implement each provider's specific info into separate files and import them into the /oauth function, invoking each as needed.
Changing User Details
Right now we just copy the user details from GitHub right into our new User object. Maybe we want to give the user a chance to update those details first, or add additional information before saving to the database. One solution could be to create the Identity record, but redirect to your real Signup page with the info from GitHub (and the accessToken) and prefill the signup fields, giving the user a chance to change or enhance them, adding the accessToken to a hidden field. Then when the user submits that form, if the accessToken is part of the form, get the user details from GitHub again (so we can get their GitHub id) and then create the Identity and User record as before.
Better Error Handling
Right now if an error occurs in the OAuth flow, the browser just stays on the /oauth/callback function and sees a plain text error message. A better experience would be to redirect the user back to the login page, with the error message in a query string variable, something like http://localhost:8910/login?error=Application+not+authorized Then in the LoginPage, add a useParams() to pull out the query variables, and show a toast message if an error is present:
import { useParams } from '@redwoodjs/router'
import { toast, Toaster } from '@redwoodjs/web/toast'

const LoginPage = () => {
  const params = useParams()

  useEffect(() => {
    if (params.error) {
      toast.error(params.error)
    }
  }, [params.error])

  return (
    <>
      <Toaster />
      // ...
    </>
  )
}